Showing posts with label mums. Show all posts

Wednesday, 14 August 2013

The Handmade Home - 'A Tour of Our Nursery'


You may be aware, that as well as writing my blog, I am also a writer for the family section of PVB Daily - a really great website promoting small businesses.  I've recently written a few articles about some of the upcycling and handmade projects I undertook when I was making Daisy's nursery; so I thought I would write a post 'tour of the nursery' as I'm really proud of what we have achieved.  Some of it is still a work in progress, but I think the overall look really reflects my love of all things handmade and I hope little D loves sleeping in there!

Upcycled Welsh Dresser - You can read about our upcycling of this welsh dresser HERE; it was met with some criticism,
but I think it will go on to be a staple and useful piece of furniture for D's room as she grows older.  As you can see, she already has toys in abundance - most of the top shelf were mine from various ages (there is a photo of me as a toddler, with this Panda).  Typically we have Jemima and Peter smattered about across the nursery - including the little money box, which was bought on a 'Babymoon' trip to Wales in February.  In keeping with the 'rabbit' theme and I have to shout out my lovely friend Naomi Smith, who drew this gorgeous rabbit picture and framed it in a vintage frame and Jodie, who handknitted the little pink rabbit on the top shelf.  My Beatrix bookends were also an eBay bargain - I often find new baby items being sold for very cheap on eBay, simply because people can be a bit overrun with presents!


Painted Vintage Chest of Drawers - Donated by a friend, this gorgeous 1940s chest of drawers was sanded, primed and painted white and the original dresser mirror removed.  This type of traditional oak furniture often seeps slightly during restoration - but I like the antique
look of the drawers.  I also placed pink polkadot paper to line each drawer and help protect Daisy's clothes.  The wide top doubles up as a great space for changing if necessary. 

Cot - Purchased from Ikea, I love the traditional design and, as with all Ikea furniture, it was easy to assemble (for my OH!) and the mattresse is really comfortable for Little D.  I've found some perfect fabric for the cot bumper, though I've not yet got around to making it yet - I've heard hundreds of conflicting opinions on cot bumpers, their use and how safe they are - which has somewhat put me off!  The blanket is also a homemade sensory blanket - I blogged about this and my love of knitting HERE

 
Cot Mobile - Another handmade item, you can read the tutorial HERE.  I have found most cot mobiles on the market to be expensive and also quite bulky, so in fitting with the theme of the nursery, I made a little mobile of
Jemima and her ducklings, the overall cost of the materials came to under £10 and I made it in just a few hours.  For me, yellow is a colour that young babies really respond to - Daisy loves to watch the ducklings chasing around when she is falling asleep.

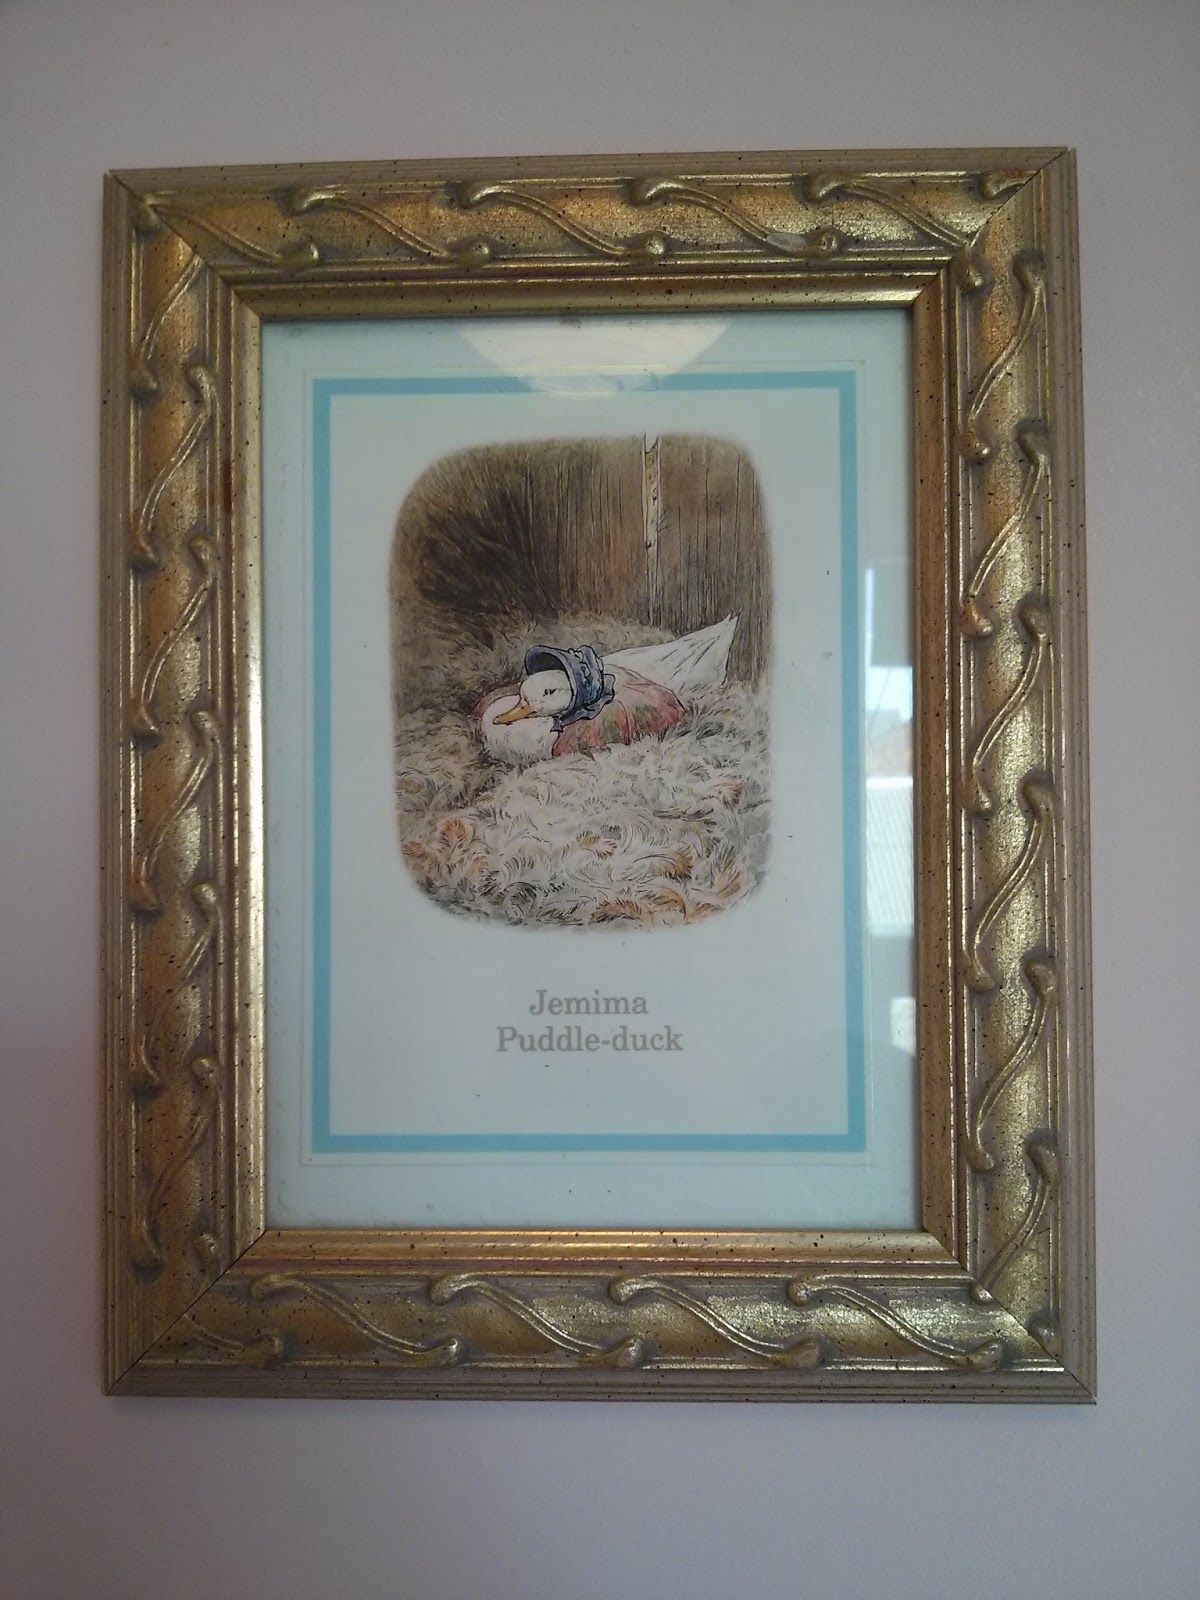
Beatrix Potter Framed Pictures - I love mismatched frames and am currently planning a collage display for our front room.  Each of these frames were purchased from local charity shops and we found a pack of vintage Beatrix Potter pictures on eBay.  The trouble was, deciding which characters were going to take pride of place in the nursery!


Selection of antique toys and ornaments - I'm already really pleased with some of the lovely toys we have been given for Daisy, the abacus will be perfect for early stages of learning and Daisy already loves Humpty, though he's almost as big as her!  The Peter Rabbit and  a selection of Postman Pat ornaments that were mine as a baby, so it's lovely to pass these down through the family. 

I love experimenting and trying new crafts - follow my blog for more craft ideas, bargain hunting and tutorials as I continue to make my Handmade Home!

Wednesday, 7 August 2013

Peachy Review: EllieBearBabi Nursing Scarf

If you have read my blog, you will know how much I LOVE to review new things - I have already had the pleasure of reviewing wonderful music from Bad Bad Me and The Barnum Meserve, I've also used Life is Peachy as a platform to promote some fantastic small and handmade businesses that I have discovered in my Twitter roaming!  So I was absolutely ecstatic when I was asked by the lovely Vicki, from EllieBearBabi, to review one of her handmade nursing scarves.


EllieBearBabi, or Vicki, is a relatively new handmade business set up in Vicki's hometown of Belfast, Northern Ireland; after she discovered that the family crafting gift had been passed down to her when she made some lovely blankets and bibs for her little one (now 7 months old).  After her transformation from self-described 'Jack-of-all-trades' to Stay At Home Mum, Vicki decided to make more of her lovely handmade goods and, in July, her Etsy shop for EllieBearBabi (named rather beautifully after her Mum's lovely old sheepdog) went live!  You can view, browse and perhaps shop to your heart's content at Vicki's Etsy shop HERE

I was sent this very on-trend aztec print to try out, Vicki does two sizes in her nursing scarves and I went for the Medium size, as I am sitting at about a curvy size 12, right now.  I must also publicly thank Vicki for the little bib she added in too - it's a hit with Little D!  

Nursing/feeding, has been somewhat of a blessing and a nightmare for me.  I think it's a perfectly natural thing to do (and what choice do you have when you are feeding 'on demand') yet there is still a
stigma attached to breastfeeding in public and I, for one, still find it an uncomfortable experience under the watchful eye of the public.  Cue EllieBearBabi's nursing scarf!  Taking the scarf out with me on my usual trip to the local park what I noticed, first and foremost, was just how light and wearable the jersey/lycra mix was to wear - I'm certainly not one for layering up in the heat, but this felt really comfortable around my neck.  

When it came to feeding, it was so lovely not to have to faff around with resting a blanket corner on the shoulder, Daisy just sat perfectly in the scarf loop and settled well into a feed, I think I relaxed almost immediately without having to deal with the usual problems of checking nothing was on show, or constantly readjusting for mine or Daisy's comfort.  The material felt dense enough for you to feel 'safe' in that you're not showing too much off and soft enough for baby's comfort too! 

In short, EllieBearBabi's Nursing Scarf was something of a saviour in, what can be, a trying situation for any nursing Mum.  Her designs are simple and stylish - simple in that they work without the need of a degree in Rocket Science to work them out, stylish in that this one will almost certainly find a way into my post-nursing wardrobe.
  In the pictures, I teamed the print with an old favourite, the breton top, as the print had such vibrant colours and looked great against the stripes.  This particular design would add a great pop of colour to a winter wardrobe!

EllieBearBabi's designs are beautifully made, the materials are of a really high quality and each item is labelled with handmade love too!  Her bibs retail at just £3.00, an absolute bargain, whilst nursing scarves are a real investment at just £15.00 - I advise every woman who has ever struggled with public feeding to stock up, it may just change your life!

And I could hardly leave out a picture of Daisy in her new bib either!


Want to keep up to date with EllieBearBabi?  Why not give her a follow on Twitter @EllieBearBabi.

Vicki is also a newbie blogger over at EllieBearBabi, check her out!

Friday, 5 July 2013

Friday's Kitchen: The Neapolitan Birthday Cake


Anyone who knows my beau, Mr Peachy (not his real name, obv), will know that one of his favourite stories of 'us' is the tale of how he managed to convince me to make my own Birthday cake without me knowing, last year.

The scene was set, Mr P had arranged a surprise dinner party for me.  All I knew, was that we were heading out to dinner, after we had dropped off a carefully baked Victoria Sponge to his 'work colleague'.  10 minutes on the bus later, I walked into a room of 20 friends and family sat waiting patiently at Edin's restaurant, and it became clear that I had slaved over a hot oven for, well, me actually.

This year, I decided to cut out the middle man and pre-empted my other half's love of practical jokes, by claiming that I would make my own cake!  And what better way to celebrate in style, than with a beautiful, decadent Neapolitan Birthday Cake! 

The original idea was taken from a magazine, 'Making Cakes', but I adapted with my own cake recipe and buttercream icing.  I made the pink and white cakes at the same time for ease, but you can make all three cake mixes separately if you prefer, simply halve the ingredients for the pink and white cakes.

Ingredients:
                  For the Pink and White Cakes                      
                                     280g Caster Sugar                                        
                                240g Self Raising Flour                                   
                               80g Soft Salted Butter                                   
                                              2 Large Eggs                                                
                            240ml Semi Skimmed Milk                              
                                1tsp Vanilla Extract                                       
1 Pinch Salt
3-4 Drops of Natural Red Food Colouring

For the Chocolate Cake
140g Caster Sugar
100g Self Raising Flour 
40g Soft Salted Butter
30g Cocoa Powder
120ml Semi Skimmed Milk 
1 Pinch Salt
  
For the Buttercream (All three colours)
1 kg Icing Sugar
240g Soft Salted Butter
75ml Semi Skimmed Milk
1 tsp Vanilla Extract
20g Cocoa Powder
3-4 Drops of Natural Red Food Colouring

Method:
Firstly, preheat your oven to 190 c (170 c for fan ovens, gas mark 5).  to make your pink and white cake mixes, put your caster sugar, flour, salt and butter into a bowl and mix (using either a mixer or hand whisk) until the mixture has a breadcrumb consistency. 

In a separate jug, mix the milk and vanilla extract and add the eggs.  Beat until smooth and add most of the milk mixture to the dry and whisk until combined.  Add the last little bit of milk mixture and continue to whisk until the batter is smooth and fully combined.  

Carefully, pour half of the mixture into a second mixing bowl and slowly add your drops of food colouring until the mixture is your desired colour of pink.  I find 3-4 small drops achieve a lovely pastel pink colour.

Keeping both your mixtures separate, pour into 8" prepared round tins and bake for approx. 25 mins, or until the cake is goldening in colour and a knife skewered completely through the middle is completely clean when removed.  Place cakes on a wire rack and leave to cool.

Next, follow exactly the same method to make the chocolate cake - adding the cocoa powder in at the beginning, with the dry ingredients.

Once you have baked all three cakes and they are all completely cool, you are ready to make your icing and decorate your cake!

To build your cake, start from the chocolate layer at the bottom.  Measure out 250g of icing sugar and 80g of butter and mix together until they have formed a soft, combined mixture, there shouldn't be any big lumps.  Slowly pour your cocoa powder in and continue to mix until the icing changes colour.  Finally, add 25ml of milk and mix until combined and firm - the icing cannot be runny.


Once you have the desired consistency, tip the icing mixture into a piping bag with a medium sized star nozzle.  Place your chocolate cake on a plate/cake decorating plate and, keeping a steady hand, start icing your rose designs on the side of the cake.  I find it easier to start from the inside of the rose and work out - I think the results are always neater.  Continue until the sides of the cake are completely covered.  

Using the rest of the icing, spread the top of the cake with a palette knife and place your pink cake on top.  Place in the fridge for 10 minutes, just to help the iced roses set.

Repeat the icing process with the pink cake - make the mixture in exactly the same way and add your drops of food colouring at the end of the process.  add vanilla extract to the milk for a touch of flavour.  Remove the cake from the fridge and ice your pink layer in the same way, spreading the remaining mixture with a palette knife on the top and place your white cake layer on top.  Place back in the fridge.

The vanilla icing mixture uses 500g of icing sugar, 160g butter and 50ml milk - you need to make more to ensure that the sides and top of the white layer are covered. Once this is made, remove the cake from the fridge and repeat the icing process.  To decorate the top, ice in exactly the same way, starting at the edges and working inwards.  If you have any gaps, pipe the remaining icing in short bursts to cover up the holes.  I would recommend leaving in the fridge for an hour or so until you are ready to serve!  Once cut, this cake will last for up to 4 days in an airtight container.

There you have it, my first attempt at a Neapolitan Cake was a success!  It was even retweeted on Twitter by the wonderful John Whaite, winner of last year's Great British Bake Off.  I've had some amazing feedback and comments - so a big thank you to everyone who tried it or who took the time to tweet me about it!


Why not give it a go yourself?  If you have an occasion coming up it makes the perfect centre piece!  And don't forget to upload your results to the Facebook page - www.facebook.com/lifeispeachytales

If you are local to the Nottingham area and would like one made for an occasion - please email me at missemmaberry@gmail.com, I would love to hear from you!  As ever, I love to hear from people who read the blog and would love your comments!!  Have a lovely weekend! E x

Wednesday, 26 June 2013

The Handmade Home: Papercut Writer


I've always admired the work of Rob Ryan and the likes.  The intricacies of Papercutting really interest me, I've seen such beautiful artwork in this form and have really wanted to give it a try.  I love the depths that Papercut artwork creates and, particularly with Rob Ryan's work, there is a certain 'life' to the flimsy and magical world he creates with his laser-cutting techniques.
The delicious and quirky world of Rob Ryan


Father's Day was in fear of coming and going this year.  I've been so busy writing, blogging, raising Daisy and planning ahead to post-Mat Leave work that trips to town are becoming scarcer by the week.  This year, to mark Mr Peachy's first Father's Day, not to mention avoid the Paperchase queues like the plaque, I decided I would try my hand at some simple Papercutting to make a card for Mr Peachy.

John Lewis stocked a very handy and inexpensive pack, which consisted of a self-healing craft mat and craft knife and I bought some black card and pastel paper to practice free hand writing on. It didn't take too long to get to grips with the amount of pressure the craft knife needed and the results, two hours and several feeds later, was quite accidentally a Kid Acne inspired piece of writing!
To help enhance the words, I placed some pastel peach paper on the inside of the cardand added Daisy's painted footprints (I had only had the stamina to do one set with her - the hands will have to wait); accompanied by the message 'thank you for helping me to find my feet'.

Overall, I was impressed with how quickly I felt confident in gliding that craft knife across the paper, there was a certain ease to it, though I now feel I want to try my hand at some more intricate images and challenging italics (never satisfied).  

I might not be quite up to scratch just yet, but this simple technique has definitely given me the bug for paper cutting.  Watch this space for more papercut 'masterpieces' to come!

Have you ever wanted to try a craft?  What was it and how did you get started?

Monday, 24 June 2013

Ashes To Ashes: A Review of James Herbert's 'Ash'

Fan? Much? My cluttered bookshelf
Earlier this year, one of my favourite author's James Herbert, one of the most well-renowned horror writers, passed away.  He was 69 years old, no cause of death was published and, in my opinion, he has left a gaping hole in the world of horror fiction.

'Ash' was Herbert's last, and potentially his most controversial, novel to date.  A mammoth paperback at nearly 700 pages long, Just this fact alone set it apart from his usual quick-scare paperbacks.  The artwork was a mark of Herbert's usual foreboding, ghoulish imagery, but the tone of the book immediately felt slower paced, easing you in with several character introductions.  All this from a man who, in 'The Dark' (my first descent into Herbert-madness), shocked his reader with a particularly nasty killing by a 4 year-old, just 5 pages in.

Herbert chose to re-visit one of his familiar characters, skeptical and moody psychic investigator David Ash,for this story.  Those familiar with his character, will no doubt remember the traumas he suffered in 'Ghosts of Sleath' and 'Haunted', yet his indifference and quest to find rational explanations for strange goings-on remains un-perturbed.  Ash is hired by a mysterious group of people who run the equally mysterious 'Comraich Castle', a secret home from home for the both very rich and very disturbed, when a terrible and seemingly supernatural murder occurs within the grounds.  Cue exposed secrets, reams of 'dead' celebrity psychopaths, some particularly nasty and bloodthirsty wildcats and the suggestion of a secret royal son residing in the grounds, as the reader is taken on a twisted journey with Ash and his sudden sidekick, psychologist Delphine.


All in all, Herbert's last masterpiece is everything you would both want and expect from a horror story.  Herbert manages to provide his usual mix of grisly murders and intrigue throughout even if, at times it felt as though some of the most important characters and plot points were glossed over in favour of love scenes.  There were still plenty of shocks, gore and scares to carry me through the pages, though I didn't stay as gripped as I had done his other books, The Magic Cottage still being an unbeaten favourite.

I don't know if I felt this because I read this book post Herbert's death, but there was something chillingly finite about this book.  The controversy of the inclusion of such characters as Lord Lucan and other notable murderers from history, alongside Herbert's own dig at his previous works such as The Rats, suggest to me that he may even have known his time on this earth was limited, hence giving himself the freedom to push even more boundaries.  Either way, the lagging pace at certain points didn't make this book any less than enjoyable than the others and if Herbert wanted you to ponder the blurred line between fact and fiction ever after, he succeeded in doing so, in his unique, horrific way. 

Coming soon: A review of Jeanette Winterson's 'Why Be Happy, When You Could Be Normal?' 


Do you have book you would like me to review?  email missemmaberry@gmail.com

Friday, 21 June 2013

Friday's Kitchen: Bake-Well Well Well


The truth be told, I have quite the juxtaposition problem when it comes to baking.  I have a fond love of pastry goods, namely the classic Bakewell tart, but an irrational fear of baking shortcrust pastry.  I've always promised myself I would get over this and, one day, when the nightmarish visions of a pregnant woman scorned by mince pies 'gone wrong' subside, I'm sure I will.

Fate, or Fay, as it happens, came to me in the form of one of Fay Ripley's recipes showcased on the 'Lorraine' programme; the 'Easy Bakewell Cake'.  Nothing could be more 'Ronseal' about that title.  I watched in amazement as Fay casually chucked a load of base ingredients into a mixer to form a sumptuous Bakewell inspired cake.

I've never been a 'chucker' when it comes to recipes, but I was compelled to discard my usual need to conform by the gram and give this one a go.

Here is the link to Fay's recipe, as featured on Lorraine, with ingredients and quick method:

http://www.itv.com/lorraine/food/faye-ripley-easy-bakewell-cake/ 
  
 Ingredients:
150g Self Raising Flour
150g Ground Almonds
150g Soft Butter (I always cube it to ease mixing)
150g Caster Sugar
2 Large Eggs
6 tsp Raspberry Jam
150g Fresh Raspberries
50g Flaked Almonds
1 tsp Vanilla Extract

Method:
1. Preheat oven to 160 (fan), 180 C or Gas Mark 4. Line a 22-24cm springform cake tin with baking parchment.

2. Use a food processor or electric whisk and whizz the butter, sugar, flour, ground almonds, eggs and vanilla extract. Put half of the mixture in the tin and smooth.

3. Dot the jam, 1/2 teaspoon at a time all over and scatter the raspberries. Drop the remainder mixture over the fruit and smooth over with your fingers.

4. Scatter the flaked almonds on top and bake for 45-50mins until golden. Cool and then serve with ice-cream, custard or just have it on its own!


I think what is so lovely about this recipe is that it is quick, light and bound to be a winner with any friends or family in need of a quick cake fix.  For anyone with a busy lifestyle, it's a perfect 'throw together and chuck in the oven' recipe  I am slowly starting to introduce myself back into the joy of baking, as opposed to the stress of icing 100 cupcakes in a shared kitchen with one mixing bowl, and this was the perfect recipe for that 'quick-win' baking feeling.

The sponge itself is really light and fluffy, the perfect accompaniment to a cheeky afternoon tea.  I would be tempted to try substituting the jam for different flavours and would maybe try using fresh cherries for a sour kick.  Drizzling fondant icing over the top might also work - a Peachy homage to the classic Cherry Bakewell!

Overall, fabulous recipe, perfect timings and Fay Ripley's 'What's for Dinner?' cookbook, has shot to the top of my wishlist!


Tried it? Love it?  As ever I would love to hear your thoughts.  If you have a go at your own, why not upload it to the Facebook page, it's so nice to see everyone's results!

Friday, 14 June 2013

Friday's Kitchen: The All American Breakfast!


Prior to having my daughter, Daisy, breakfast was usually something of a rushed affair of branflakes and throwing tea down my throat, in between putting make-up on whilst the other half opts for another ten minute 'snooze'.

These days, with Mr Peachy having to work weekends, breakfasts on his days off are something I really look forward to and, if time allows, I like to treat a lazy Sunday breakfast as I would an evening meal.

They say diets always start tomorrow...well this was definitely the case when I decided to try my hand at American-style pancakes with bacon and maple syrup.  What was always a pre-holiday early morning treat at the airport, seemed to be the perfect way to snuggle up with the family on a rainy Sunday.

For the pancakes, I used a Nigella Lawson recipe; a woman I strongly admire for her refreshing attitude towards food and balanced eating, not to mention her ability to look forever on-point, curves and all.

Here is the recipe:

http://www.nigella.com/recipes/view/american-breakfast-pancakes-141 

Ingredients: 

1 tablespoon baking powder 

1 pinch of salt 

1 teaspoon white sugar 

2 large eggs (beaten) 

30 grams butter (melted and cooled) 

300 ml milk 

225 grams plain flour   

butter for frying 

Method: 

The easiest way to make these is to put all the ingredients into a blender and blitz. But if you do mix up the batter by hand in a bowl, make a well in the flour, baking powder, salt and sugar, beat in the eggs, melted butter and milk, and transfer to a jug: it's much easier to pour the batter into the pan than to spoon it. 

Heat a smooth griddle or pan on the stove.

When you cook the pancakes, all you need to remember is that when the upper side of the pancake is blistering and bubbling it's time to cook the second side, and this needs only about 1 minute, if that.  I managed to make about 8 large pancakes from these measurements.

Stack the pancakes as you cook them, serve with lashings of maple syrup and grilled smoked bacon and add a steaming cafetiere of good coffee.  Add to the mix a good black and white film and there you have it, a perfect Sunday Breakfast and a treat for a deserving Dad this Sunday!

Have a lovely weekend folks!

E x


Had a go at your own?  Why not upload your results onto my Facebook page...I'd love to see them! www.facebook.com/lifeispeachytales


Wednesday, 12 June 2013

Outfit Post - The Vintage Playsuit: A Stylish Way Out of a Post Pregnancy Melt-Down


Since having Daisy, it has become my very strong belief that an image crisis, even in the most self-assured woman, is all but inevitable.  Nobody likes to admit this, why would you?  But when you are suddenly heavier, bigger, less fit than you used to be, not to mention in need of a post pregnancy wardrobe, I think new mums are more than allowed to encounter one or two wardrobe meltdowns.

I've always been quite confident in my style, the one thing that's remained the same since I was able to think 'fashion' for myself, is that I've never wanted to look like anyone else; i've inhabited my own style - from my heady college goth days to my current vintage-inspired rockabilly look.  But it  has surprised me just how many near-panic attacks I've had at opening the wardrobe and not being able to wear everything in it, just yet.  I'm dressing for a slightly different body shape and they say it takes up to a year for a woman's body to return to normal, after giving birth.  To add insult to injury, my first night out is coming up and I don't know what I'm going to wear! So, what to do in the meantime?

REGROUP, DON'T CHUCK
I'm not quick to chuck out clothes, I've purchased and gained some fabulous items through my years in fashion retail and I do treat my wardrobe as a long-term investment.  Cheap and cheerful works sometimes, but I love to hunt out classic, timeless pieces that will suit me for years to come.  However depressing it is that only about 30% may fit me right now, it is incentive enough that my other beautiful items will be kicked back into action, in a short while.  In the meantime, I ask myself, what fits, what doesn't fit and what am I missing to emulate my style for now?

WHAT DEFINES YOUR STYLE?
Are you a dress fan?  Do you feel most comfortable in trousers?  Is there something missing in your wardrobe?  I took a good, hard, look at my wardrobe and, at the time, the answer was glaringly obvious.  I spent 99% of my time in my black skinnies, but all I really want to wear are dresses! So it was time to start looking for practical dresses, with a vintage twist, to re-ignite some yearned-for femininity.

A FUSSY MUM ON A BUDGET
Bargain hunting has become something of a passion for me, I love the thrill of finding bargains for house, home or wardrobe but have not always had the inclination to root through charity shop, some people have 'the knack' but it's something I'm still working on.  eBay is always a great place for clothing bargains and I've had some success with both buying and selling before, but it can be hit or miss depending on when you're looking.

The High Street offers great clothes at competitive prices, but I'm not feeling a lot of the 90s fashions right now, they're not very 'me', neither do they flatter my shape (before or after birth, to be honest)

Luckily for me, the vintage shop COW, in Nottingham offers a fantastic range of vintage and upcycled clothing in their new-ish two storey store.  They saved my bacon with this lovely upcycled vintage playsuit, priced at a very reasonable £17 - which I have paired here with a pair of chunky platform heels to contrast with the feminine florals.


My other half affectionately refers to this as my 'Goodnight Sweetheart' dress, which I take as a compliment.  The buttoned front is great for feeding and the frilled top creates a cap sleeve as I don't like to show off too much of my upper arms.  All in all, a very comfortable number that I can pair with flats or my clogs (loves of my life) during the day or dress up for the evening.  It's a lovely light fabric, perfect for Summer or layering in winter. 

Well done COW - you are now my one-stop shop for post-pregnancy style! Shop COW's latest collections online or, if you are lucky enough to live near one of their stores in Notts, Birmingham, Manchester or Sheffield, make sure you pop in.

http://www.wearecow.com/shop

Stay tuned for more post-pregnancy inspiration on Life is Peachy.  Do you have a go-to style or a favourite shop?  Where do you think is good for post-pregnancy clothing?

Tuesday, 4 June 2013

A Whole Lotta Love.....

It is a truth universally acknowledged (albeit, if the universe consisted of me, my other half and a legion of First Aid Kit fans), that Sweden is where it's at!  Not only does it boast a certain flat-pack furniture empire, a storming music scene (the aforementioned 'Kit, Lykke Li and Euro-sensation Robyn) and significant man-candy points (Al Skarsgard); it seems to know its stuff when it comes to footwear...in the form of Lotta from Stockholm traditional clogs!


Being a short-hat, at a mere 5"2, the warmer climes can present something of a dilemma in terms of footwear, especially for those of us whose style edges more towards the 'vintage inspired' end of the fashion spectrum.  Season after season there are hundreds of gladiators, brogues and wedges that do not compliment my seasonal knee-length dress addiction, neither do they compliment my fear of looking 'short and dumpy'.  We've done pumps to death and our underfeet have all suffered with the iconic Topshop nude ballerinas and skinny jeans combi.  

On the other hand, when I'm looking for something to give me a 'lift', heels and fashion and I are no longer seeing eye to eye.  That is, I no longer see eye to eye with the skyscraper heels and wedges that tower above me! It has taken me nearly 29 years to admit it, but there are some shoes that really are just designed to look beautiful.

After endlessly trawling the Internet for a 'go-between' stylish sandal with an innoffensive heel that doesn't make me trot like Bambi on ice, I stumbled across Swedish clogs.  Fashionista Blogs are going crazy for them, Office are stocking Swedish Hasbeens AND Lotta from Stockholm exists!

A Swedish native, now living in the UK, Lotta has built up her brand from her own fascination with clogs back in the 70s.  And there is no better time that now to invest in a pair with the strong 70s revival trend back again for Summer.  Not only that but at prices starting at £52.50 with free UK delivery on offer, they are some of the most reasonable clogs on the market


I bought a pair of cherry red peep toe clogs, with a 7cm heel they are the perfect height for walks with the pram and they compliment almost every outfit, including my skinnies and kneelength dresses.  With a wooden sole, I wasn't expecting them to be as instantly comfortable; the ergonomic design of the sole feels amazing, not to mention you feel as if you are walking 'properly'!  Finally, a perfect blend of style, femininity and practicality.  A triumph for women everywhere!  Head to their website to check out the various styles and colours....you can thank me later!


Monday, 3 June 2013

Welcome To The House of Fun...


Once upon a time, a wise old 'Clever Clog' on Twitter was reported to have shared this gem of a tweet amongst his followers; 'The Internet called, it says it has enough Blogs now'. I laughed, then I moved on.

To Blog or Not To Blog?

Throughout my pregnancy, I was sometimes shocked at the level of negativity some of the motherly types I spoke to, about the impending change I was about to welcome to my life.  I was led to believe, by some, that there was little to no point in getting up in the morning, as life as you knew it would fade into oblivion; you would be left in a haze of oversized tees, baggy leggings and incessant screaming.  Daisy was born on March 14th, after two weeks of waiting, waddling to the nearest coffee shop and downing curries.  Life, as I had known it, became suddenly enriched.

I think this feeling of euphoria sealed my decision to set up Life is Peachy.  I thought I knew what to expect, I thought I would have no time for anything.  I had trawled through the internet, through working mums, stay at home mums, debating mums, sadly unhappy mums and decided that perhaps I wanted to put Motherhood in a purely positive light.  

Do Something Everyday...For You

When you become a Mother for the first time, the one thing you cannot be prepared for is the sheer amount of love and adrenalin you will wholly exist on.  Your world changes, your priorities change and you are suddenly facing each and every day with a tiny person whose constantly changing face and abilities will astound you.  There are times you will be tired, there are times you will be frustrated, but this always fades into insignificance when you consider what you have achieved.  Daisy is approaching the three-month mark and she's already insisting on standing when being held, she has developed a morbid taste for Lana Del Rey (just like her Mother) and loves nothing more than chatting and smiling away in her chair.  Those few things alone, personally, make it all worth it. 
As for me, the personality lobotomy I was so afraid of during those bleak, self-aware hours before I was commanded to 'push', it turned out, was nothing more than an urban myth.  I was proud to leave hospital the following day in a cheerful, if somewhat impractical, dress and tights.  I still found I had a borderline obsessive interest in music new and old, books, writing, fashion, crafting, baking, recipes, tattoos and I was still itching to try pastel hair.  In the end, the pastel was a short but much-loved moment of my peachy life.  I set about trying to do one thing every day that I enjoyed.  I read, baked and wrote my way through things I had been meaning to do for months and I created Life is Peachy to share these great things with you all, as I continue to grow, try new things and develop the sense of the word 'mum' that I am most comfortable with.  I'm lucky enough to have the support of the wonderful Mr Peachy, who loves nothing more than to Daisy-dote for an hour or two so I can type up my latest musings.  Everybody has different experiences, I feel I want to share mine through Life is Peachy And that, Mr C Clog,is why I believe there can never be enough Blogs. 

I hope, if nothing else, that Life is Peachy inspires others not to be afraid of losing their identity, to try new things and most of all, to be proud and comfortable in themselves.  Whether it's practicing a new craft, sharing a new recipe or daring to bear the wardrobe, Life is Peachy is a celebration of the creative parent, who challenges themselves and embraces all that they are post-birth.  Parents do wonderful things, but this should never be at the expense of losing all sense of themselves.  Life indeed feels Peachy, I hope you'll all agree... 


E x